- Home
- Intoduction
- _Case Study Scenerio
- _Team Members
- Designing the DBMS
- _Entities
- _Attributes
- _Relationships
- _ER Diagram
- Software Sollution
- _Actors in the System
- _Business Processes
- _System Requirements
- __Functional
- __Non-Functional
- Programming with SQL
- _Normalization Steps
- _Relational Database
- _SQL statements of table creation
- _ statements of adding data
- _SQL queries
- Conclusion

 Software Sollution
Identification of Business Processes
It's difficult to run a salon business when there's so much competition. It can be difficult and overwhelming to run a salon. Even the tiniest blunder can have a major impact on your business. To stay competitive, all salons, big and small, old and new, must embrace technology. Because it streamlines and automates many operational processes, implementing a sa…
Read more Conclusion
Conclusion
Salon BETA " We are stylists, we make hair contact before eye contact " " An eco-friendly, attractive online system that facilitates the Internet. A worldwide system that allows anyone to use it from anywhere. 24 hours service. " The scenario we, the members of the beta team, have chosen is to set up a day-to-day business management system in a l…
Read more SQL
SQL
SQL queries and the result set
SELECT Query This use for view tables with or without filters/conditions. Syntax SELECT * FROM table_name ; UPDATE Query This use for modify the existing records in a table. Syntax UPDATE table_name SET column = value WHERE condition ; DELETE Query This used for delete existing records in a table. Syntax DELETE FROM table_name WHERE condition ;
Read more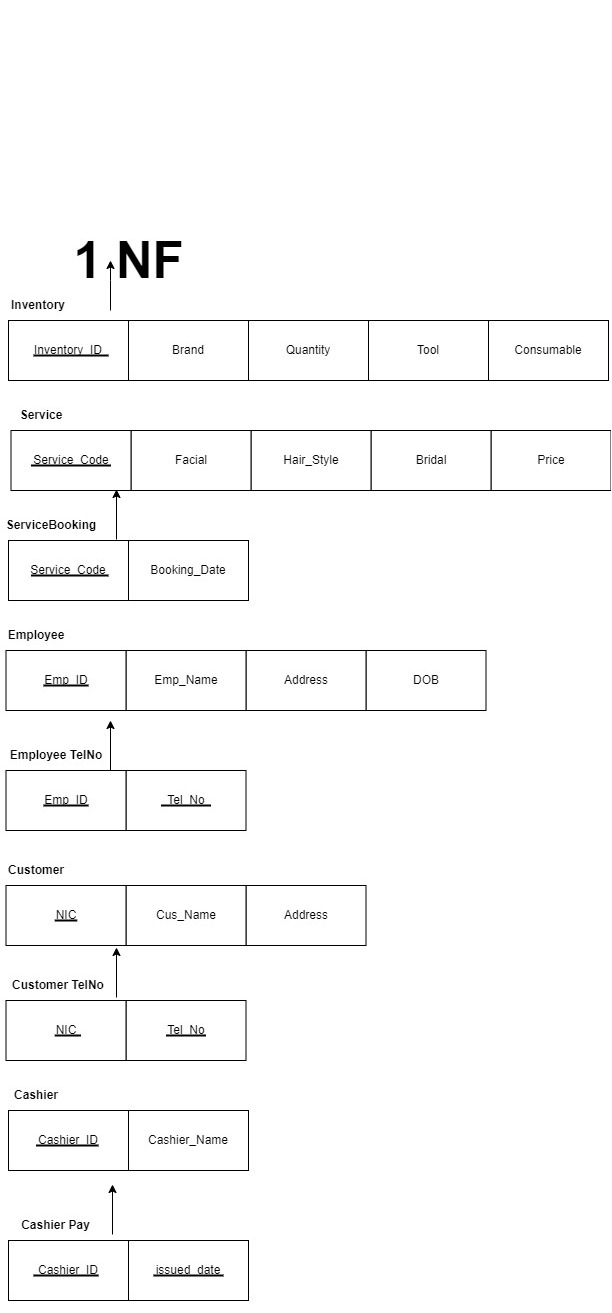
 SQL
SQL
SQL statements of adding data
SQL statements of adding data; INSERT INTO table_name VALUES (value1, value2);
Read more


